-->

Tuesday, 25 September 2012

Look at my Buttonhole!

Yes, it is true.  I still have not finished the pink blouse.  I have been sissying out on that for months.  On Sunday I decided I was going to do something sewing-wise everyday this week.  Yesterday's goal was to finally master the buttonhole.

I had tried to create a button hole a while ago on regular fabric but it had ended...badly.  My zig-zag stitch was all puckered up, my fabric was bunchy and it just looked bad.  Not something I wanted to put on my blouse.

I figured I would try again and use a fabric combination which was as similar to my blouse button placket as possible.  So I fused some interfacing to my blouse fabric and doubled it over and away I went.  Hello internet instructions.

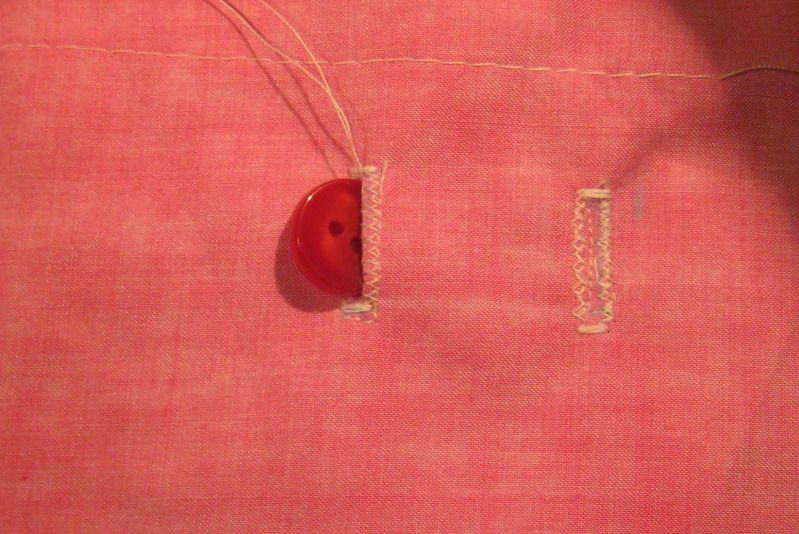
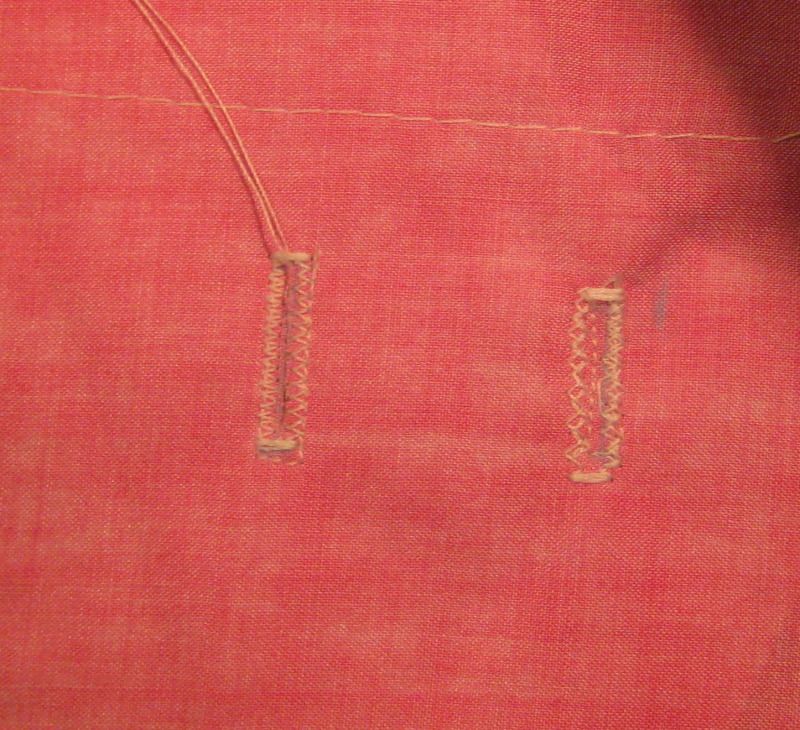
The right hand button is try number 1. I followed an example on "About.com" and was not very pleased.  It just looks messy although the interfacing and me fussing with the tension has helped with the zig zag stitch.

Not completely happy I searched the internet some more and came upon Sewing 101 's instruction using a button hole foot.

'Hey' I think. 'Don't I have something that looks like that in my sewing box?'

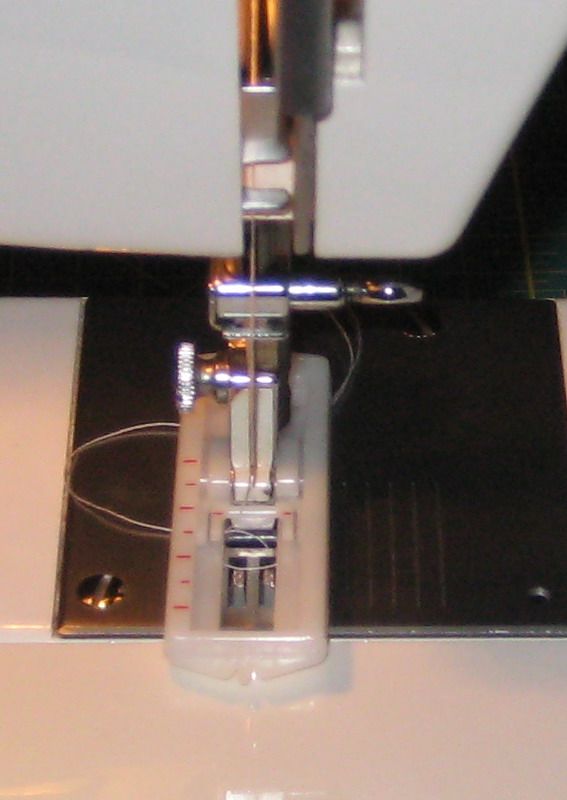
After much digging and grumbling and wondering if I had just imagined it, I came across this darling.

This lovely foot is my savior.  Suddenly buttonholes are all happy and straight and pretty (well mostly. I still have to practice).  The button hole foot created the button hole on the left. Not too bad.  It was really easy to use too.  

Even a button will fit through it.
So this weekend I WILL finish my blouse and I WILL wear it on Monday!

*Happy dance*


Sunday, 16 September 2012

Sleeping can be cute

When I went home in August for my friend's wedding, I admit, I had ulterior motives.  Shopping.  Fabric shopping.

Recently I found myself dissapointed as I realized that the first pair of flannel sleep pants I made about 5 years ago had finally worn out.  I am talking distressing holes in the behind.  So I had a goal to find a new cute flannel print to sew a second pair.

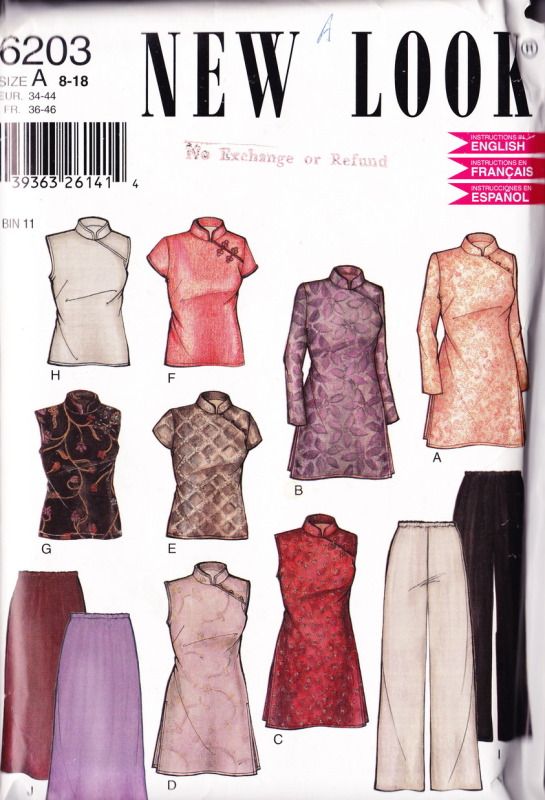
The the first pair was made from this New Look pattern which I purchased a long time ago.  Originally it was bought for the cute chinese shirts but I have never made the shirt.

When I was thinking of making a pant though, I thought of this pattern once more.  It is a really basic wide leg pant and the best part is it only has two pattern pieces!  The waistband is just rolled to make a casing for the elastic so overall this pattern only take about 2 hours  this weekend to sew. 

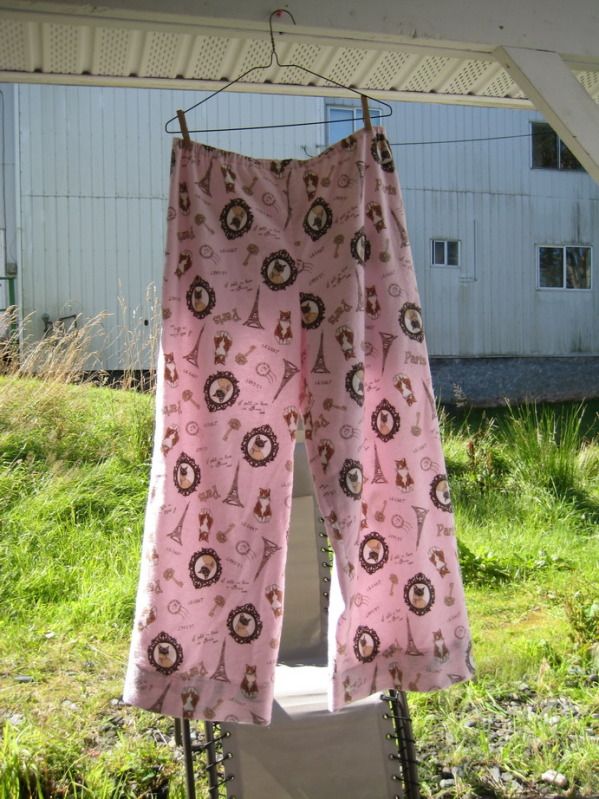
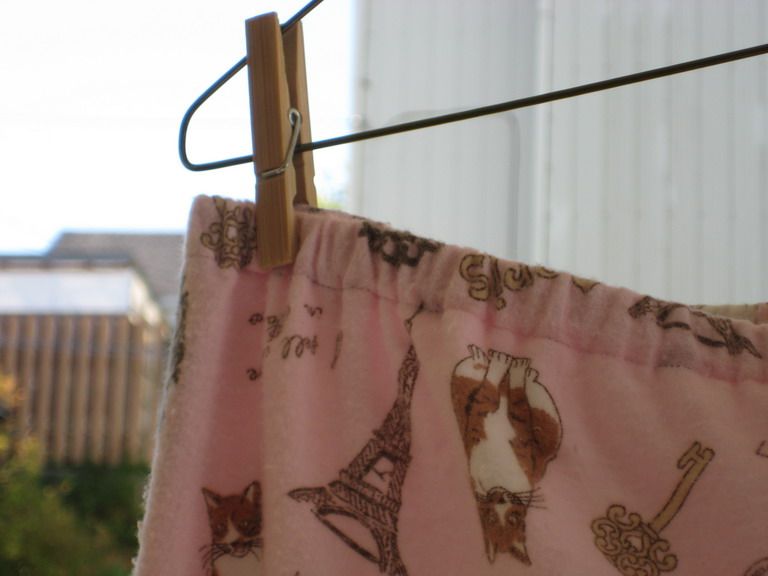
Here is the final product:

The elastic I used for this pair was better than the last.  Much more comfortable.

 Here is a close-up of the easy waistband:
Nothing to it!  I would definitely recommend this pattern to anyone trying pants for the first time.  Pants can be a bit annoying and I have sewn the legs wrong before.  (When you do you end up with a skirt, not pants.  Argh!) It was nice to make something that did not involve a lot of detail work.  Instant gratification sewing.  Nice.

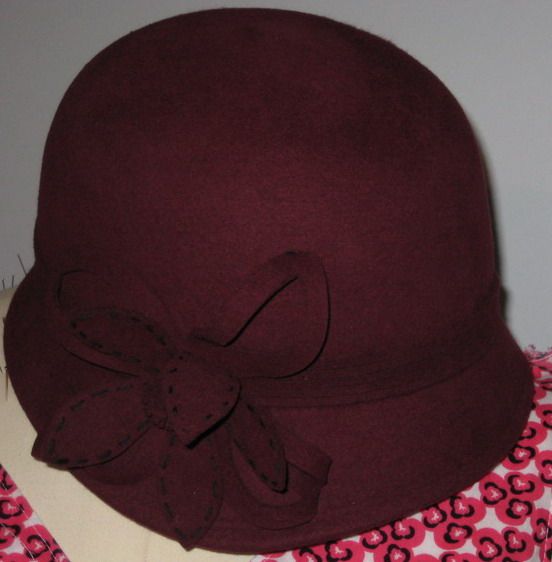
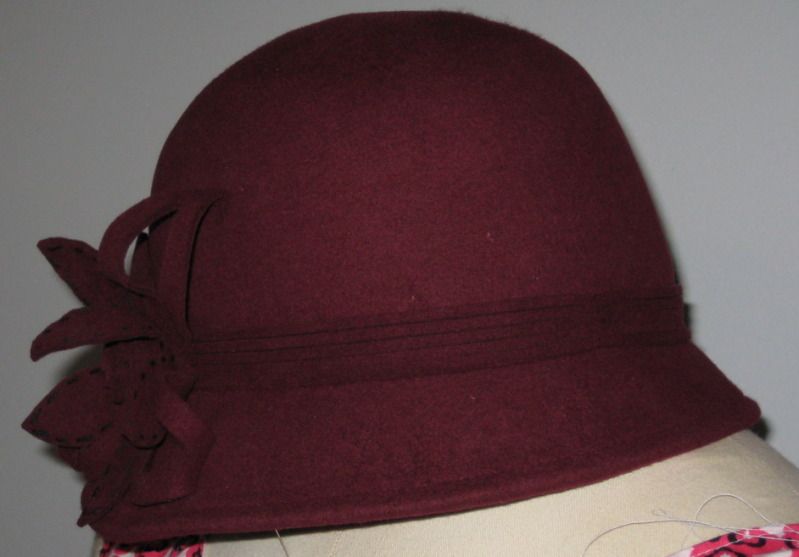
With the cold weather looming once more (Did it ever really leave?) I have been thinking about sewing some heavier dresses and more items which can be layered.  I did buy a great 20's style hat which I am hoping will be good in the fall.  Unfortunately I have to style my hair right (meaning a style which makes it look shorter) or it looks kind of silly.  I love the color of it though.

Random Rupert

There is a new Thrift shop in town called Paws and Claws.  It opened early this summer and the people who run it are simply marvelous. 

Prince Rupert and Port Edward have a big problem with feral cats.  Especially in Port Edward this has become a major problem as good hearted people feel the animals, feeling bad for them, but this has allowed the population to explode.  Sadly the cats are not healthy.  Most of them have ear mites, diseases and are many are in distress because of other health issues.

This thrift shop opened to raise money to spay and neuter these cats and get them medical attention.  The SPCA is already very busy and very underfunded and are really at a loss as to what to do about all these cats.


The owners are really great and will even deliver furniture for you which is a step up form the local Salvation Army Thrift store.  The Prince Rupert Salvation Army store philosophy is if you cannot take it with you at that moment, you can't have it.  Very uncool when your just dropping in on your lunch break and find the perfect table. :(  I have been very lucky getting vintage sewing patterns from them though.


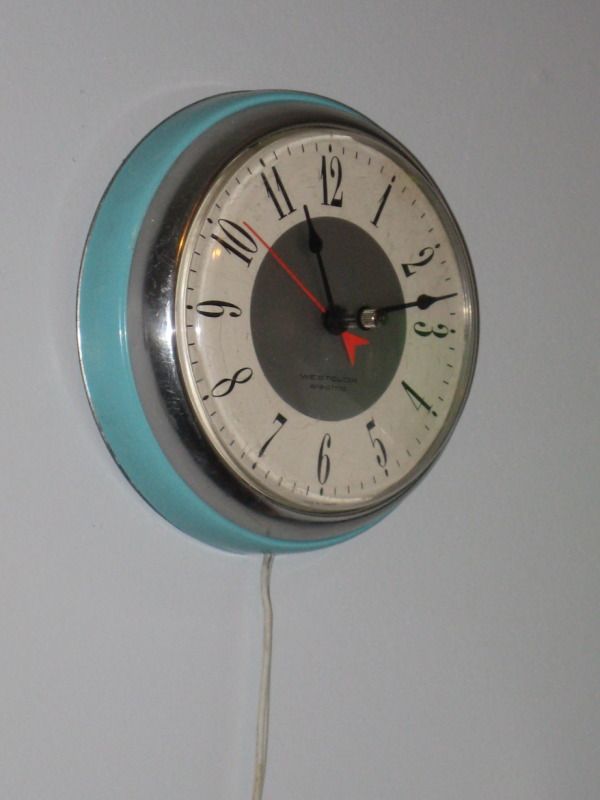
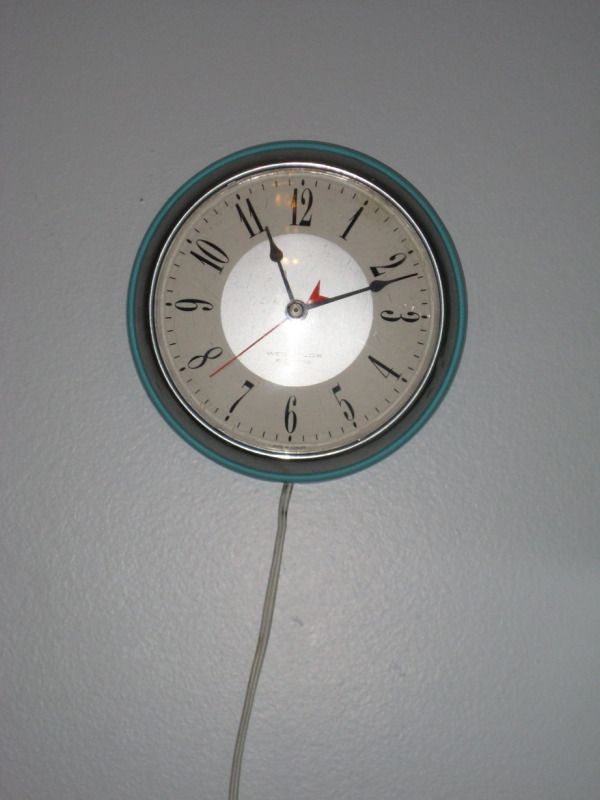
Anyway, this is my newest discovery at the Paws and Claws thrift store.  As you can see it is a 1950's wall clock.  It is so cool and looks awesome in our kitchen.  I just love the eggshell blue colour which was so popular back then.

It makes this subtle purring sound as the second hand moves which is so much nicer than the tick that most clocks make.  Now I don't have to rely on the microwave for the time anymore.  Being a plug in clock it does not solve the problem of telling the time when the power goes out. 

Oh well, cant have everything.


Monday, 3 September 2012

Couch Happens

Earlier I mentioned in passing that Hugh and I met another couple in Prince Rupert.  Yay friends!  Anyway,  this inspired the need to be able to invite this couple over to our house for dinner sometime. This is when I started looking around at our place a realize how sad it really is.

Hugh and I are slowly accumulating a few nice pieces of furniture, but the majority of our apartment is still made up of rubbermaid containers and flatpack furniture.  Yes, we never really grew out of the student phase when it comes to home furnishings.  A lot of it is the fact that we still rent our home and have the potential to move a lot and collecting stuff means we will have to pack it or sell it when we move. Annoying.

But this means that the idea of having friends over to our apartment freaks me out.
 
One problem we have with our apartment in regards to future entertaining is a lack of seating in the kitchen area.  I have an old dining table which serves double duty as a sewing table, but we have no chairs.  I sit on a old rubbermaid type container when I need to use the sewing machine.

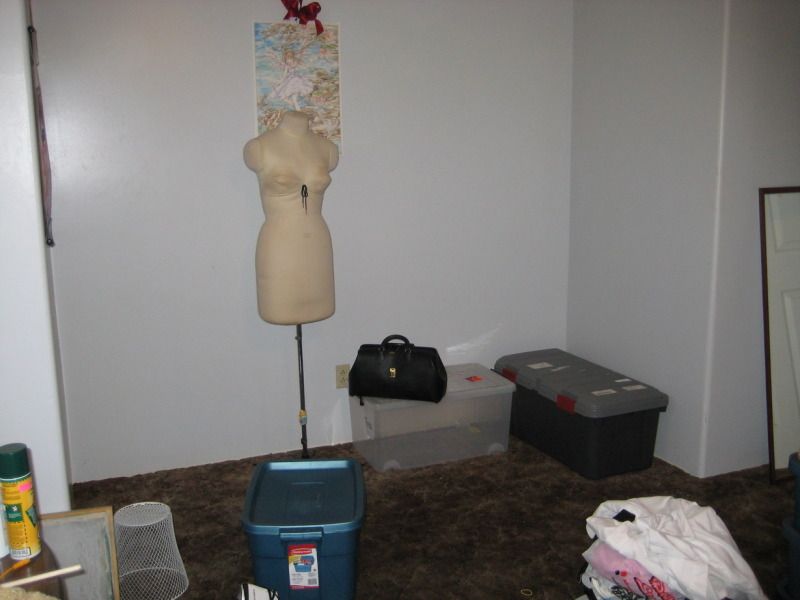
Here is what the empty wall in the kitchen looked like before we decided to do something about it.


So I decided I really wanted to get some seating organized for the kitchen area.  After looking around at sofas at the local furniture stores we quickly realized that there was no way we were spending $800 on a sofa so we decided that we would build one instead.

Unfortunately we did not really have much in the way of tools besides a hammer, a wrench and a few other odds and sods.  I decided I wanted a powerdrill.  After much discussion with my dad and research on the internet I finally found want I wanted and we were ready to go. (Buying a corded powerdrill in Prince Rupert is surprisingly difficult).

Our sofa bench had to be able to fit in our space and be high enough to to fit some of our other rubbermaid containers underneath. (Hidden storage rules.) It also had to be made with the fewest cuts as we we had to ask Home Hardware to cut the wood to length.

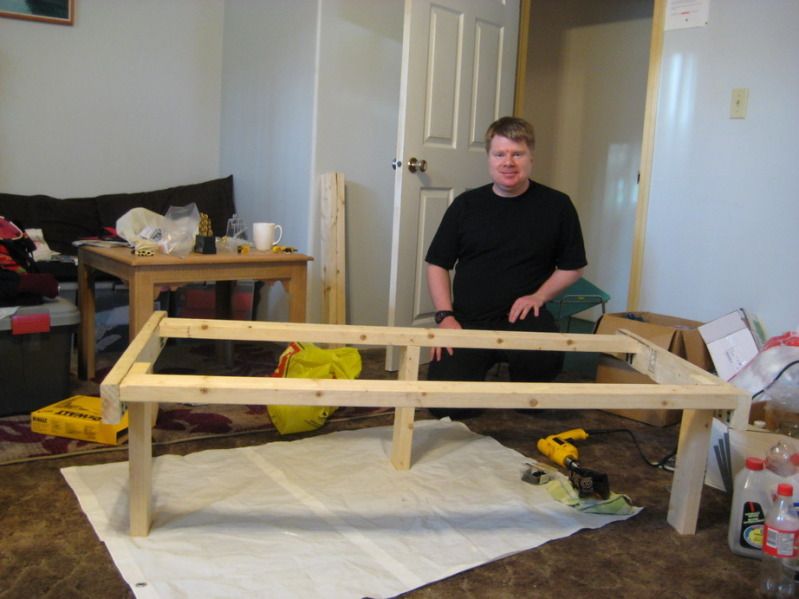
This is the base of the sofa put together. Well, most of it anyway. Note the cool powerdrill next to Hugh.  That was my anniversary gift.  I always ask for very nontraditional anniversary gifts.


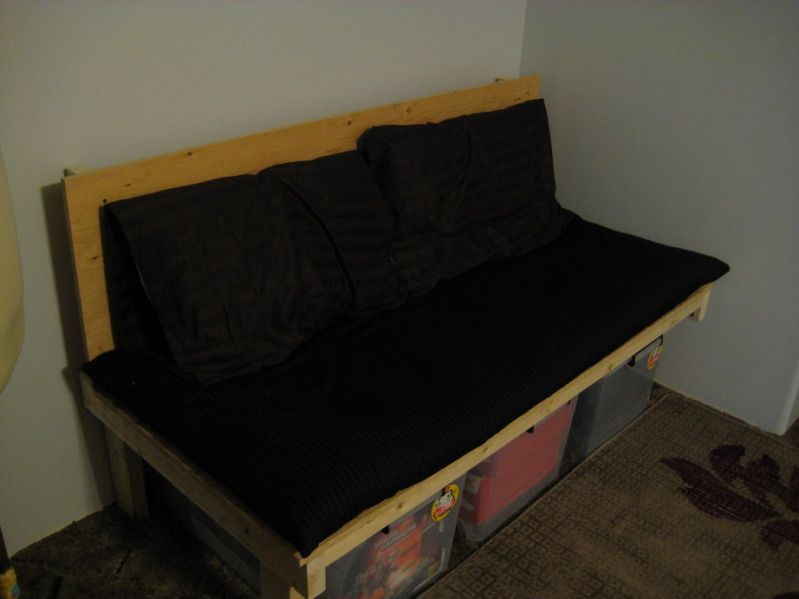
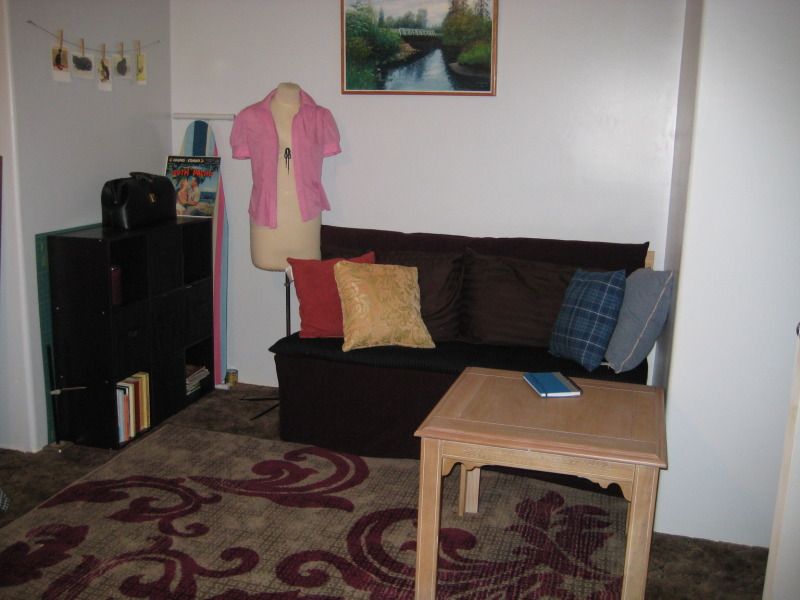
And here it is all finished.


It was made out of 2X4's (which apparently are no longer 2"X4" anymore, thieving companies) and one sheet of 3/4" plywood.  In total to cost about $60.00 for the wood.

I also made the cushions out of mattress toppers from the local Fields store which was going out of business and old blankets.

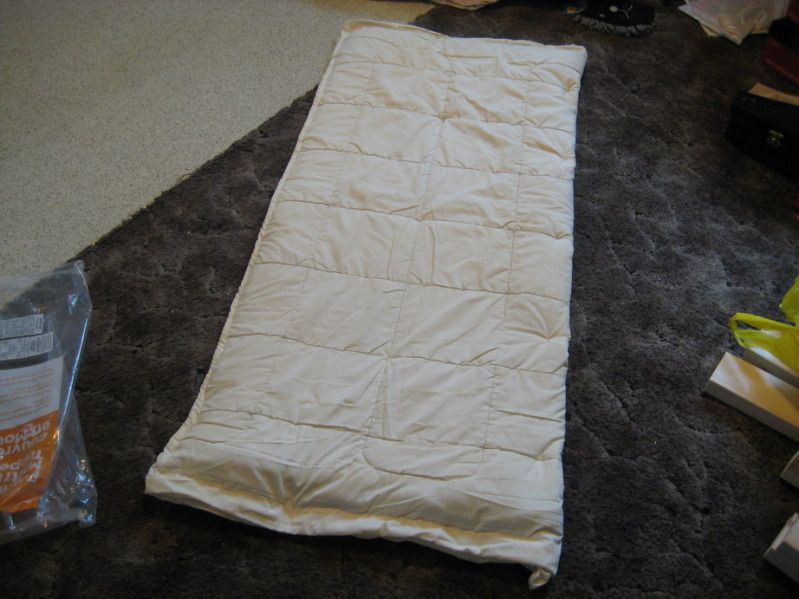
Twin blanket sewn together waiting for some foam
And then I covered it with some fabric I had in my stash and it became the above picture. Out of leftover corduroy fabric from this jumper I made a cushion for the backrest and used the last of the fabric to edge the bottom of the sofa so the bins could not be seen anymore. 

I purchased a rug and with some reorganizing my ugly wall became this:


Did you scroll up to the top to see the original space?  Before and after!
Pretty neat huh?

I bought the pillows and plan to one day recover them with some pretty fabric.  The table in front came from the thrift store for $12 including delivery. The rug is a Home hardware find.

For reference here are a few more of the kitchen.

another angle
there's the sewing/dining table
yes there is carpet in the kitchen

It has worked out pretty well.  When we had guests over for dinner we moved the smaller table and moved the dining table up to the couch and Hugh and I sat on stools.  Yay seating for four!

Anyway, I am much happier with the kitchen not looking so horrible.  Amazing what the potential for guests will do for your initiative. :)  Now I don't have to be embarrassed if someone comes over to visit.


Tuesday, 7 August 2012

Franken-suit

Eh gads I cannot believe how long it has been since the last post.  So much for my once a week plan.  I shall try to be better.

As some of you know, when I get interested in something, I get a bit obsessive.  Pianos, boots, tecras by the time I am finished I feel like I  know just about everything about them and my husband is sick of hearing about it.

I have now moved onto the playsuit.  I love the idea of having one item of clothing which covers the body all at once.  Thus my love for dresses and jumpers.  I am not so good at matchy matchy so these items allow me to be dressed quickly with the minimum of fuss.


As a result, recently I have been spending a lot of time on etsy looking for a 1950's or 1960's playsuit.  

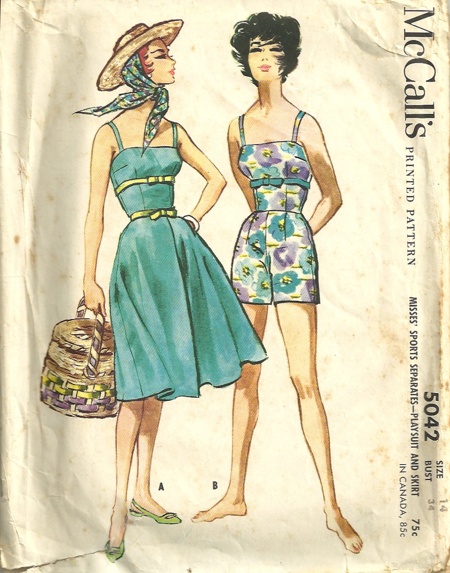
For those who are unfamiliar, the girl on the right is wearing a playsuit.

I discovered this one (below) on etsy and fell in love.  I still want to buy it, but it is pretty expensive.  There is also the issue that the bust is 2" too big and I just cant get myself to pay that much for something I would have to alter myself anyway.  It is so super cute though!
The lovely suit of awesome

So, with price being an issue and I was unable to find one which had a nice patterned fabric and actually fit, I decided that sewing the playsuit myself  would be the best option. 


I did buy this pattern (left) a couple weeks ago,  but it has not arrived yet and as I am an impatient person so I decided to design my own.

There is also the issue that it is a tie waist rather than darted but at the time I figured it would be a good start


Thus began the Franken-suit

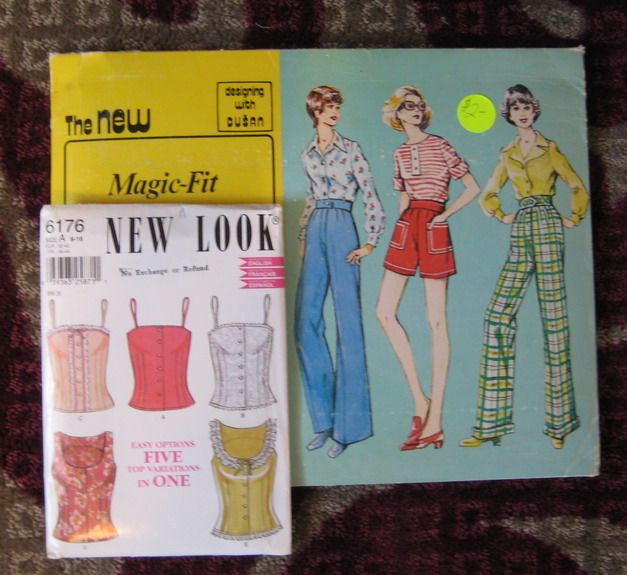
I used two patterns for sizing: 

A 1970's pant pattern and a summer top.  I drew out new pattern pieces with some changes.  I took out the button band at the front of the top and put in a seam instead.  I also added a seam to the back of the top where a zipper was to be installed.  Finally I moved the darts to try and match then when joining the top to the bottom.

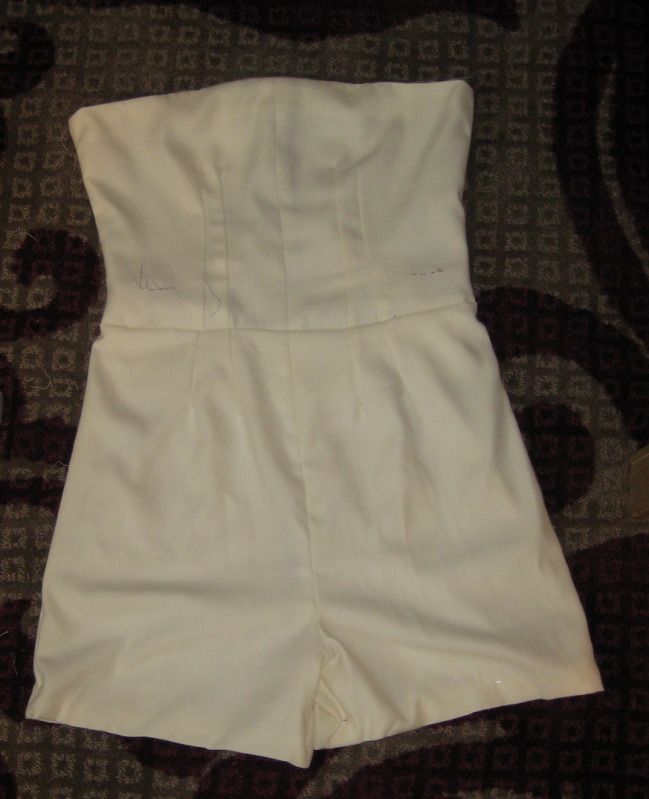
After much sewing and testing I came up with a decently fitting muslin. 


Here is the final product.  I plan to make it strapless if possible but adding thin straps would not be too hard if I decided I did not feel comfortable.

I next want to mock this up in some of my thrift store fabric and see how it looks completely finished off. (I did not finish hemming the shorts and the whole thing needs to be lined in the end I think.

Overall I am pleased with how it came out.  It still needs some tweaking but I was able to take some of the problems with the muslin and fix them on the original pattern so hopefully the next version will be better.

The pattern design and creation of the muslin took about 9 hours total on Sunday.  Being unable to stop when I am in the middle of a project, I worked until 1am that night so I was pretty tired on Monday.  Lucky it was the BC day long weekend and I did not have to do much the next day.

So next weekend, the plan is to mock this up in a patterned fabric and see if I can line it as well.

And now for more Random Rupert

Hugh and I recently discovered Morse Creek Park.  It is a 10 minute walk from our apartment and made us both wonder how we had not known about this in the two and a half years we have been here.  It is essentially a walk around a large pond which was created when they built a dam at the exit of the creek.  I am not sure why they decided to do this, but it looks very pretty.

I worry sometimes about bears and wolves being in the area, but they mostly stay up the mountain and I figure with the amount of people walking their dogs as well, Hugh and I should be okay. 

Tuesday, 26 June 2012

Collars are Complicated

The blouse has slowly chugged along.  It is helpful that I have obtained things such as ironing boards.  Ironing on the table was such a pain.

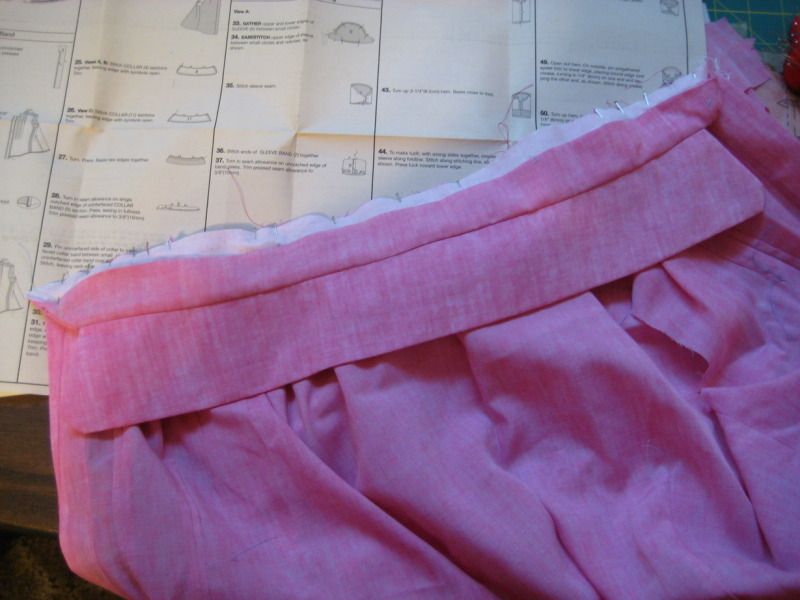
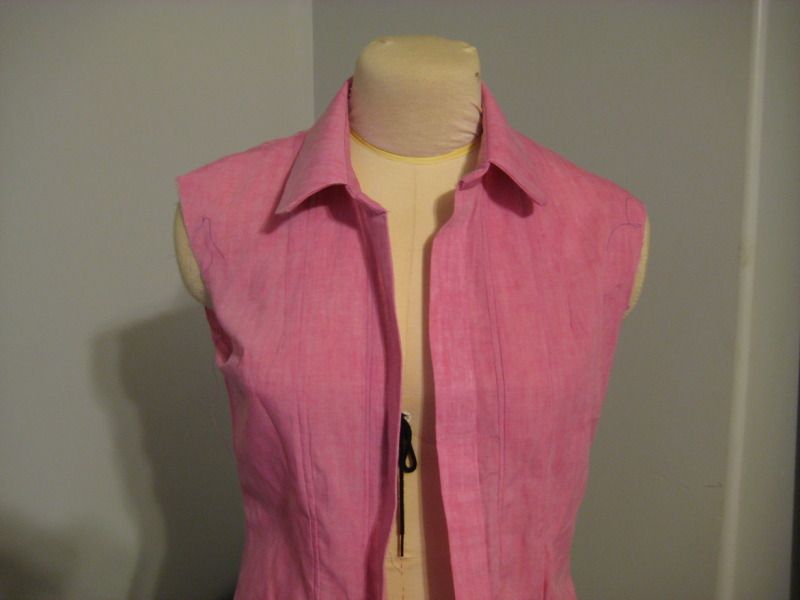
I am learning so much from this blouse.   The collar was really starting to feel like an origami project though.  I had to keep rereading the instructions just so I could get all the pieces sewn together the right way up. But in the end patience and stubbornness won the day.


Here is the hick version without sleeves.

I finally was able to put the whole thing together this weekend.  Getting the gathers even on the sleeves was a bit of a challenge.  I am looking forward to making this again now that I have figured out most of the tricks.  Sewing a second blouse should go much faster.

And here is the almost finished blouse.  Ta daaaaa!


I am hoping that the wrinkles will come out with a bit of ironing. It also fits pretty well although it is a little tight under the arms. Something I will have to address with the next one. Have you noticed what is missing? Yup, still no buttons. :) That is my project for this weekend.

Issues I had with this blouse:
  1.  I put the pin-tucks in backwards by accident.  I actually like it better this way on this blouse because the thread I used was not a perfect match for the fabric colour and as a result it pretty noticeable.  Because of this, the pin-tucks look terrible on the other side.  I guess they are officially pleats now. 
  2. I really need to make sure I iron the iron on interfacing onto the correct side of the fabric.  As a result I had to be a little creative with my sleeve cuffs but it all worked out in the end.  Man that is a beginners mistake though.  I was very frustrated with myself over that one.
Overall I think I may keep this blouse this pink colour,  I was thinking about dyeing it a more rose pink/purple but I am kind of loving the bubblegum.

I am definitely planning to make a few changes for the next blouse I make.  I would like to add a more peter pan type collar to the next one and fix the fitting of the armholes and sleeves so they are a bit less tight.

With luck I will be able to take it out on the town on Tuesday for work.

Stay tuned for home reno crafty fun!

Finally some Random Rupert

Every day I walk to work.  Here are a few pictures of what I see along the way.
As you can see it is pretty quiet in the morning. Recently it has been a nice walk as it is not quite as cold. Prince Rupert also smells really good right now. I really hope we have a nice hot summer this year. I am tired of the rain.

Tuesday, 12 June 2012

Adventures in Breadmaking

So, I want to bake bread.

Not just because the bread at Overwaitea always arrives only days before the expiry date.  Not just because the home bakery in town charges A LOT for a loaf of fresh bread.  And not just because I want to make cinnamon buns. I want to prove I can do it! And without the help of a breadmaker (mostly because I don't want to buy one).

So my best friend and her husband have been making bread for some time. (Cue jealousy) She recently made a blog post here Rachel Learns Everything about making a quick and easy bread.  It looked so good and sounded relatively simple so  I figured, sure, I can do that.

Cue the horror music.

So it started out okay.  I got Hugh to convert the weight measurements into something I could use ( I mean really, who measures water by weight??) I guess someone does.  What happened to good old metric? I added my ingredients mixed and thought "this is easy!" Covered it with saran wrap and left it in our bedroom overnight.

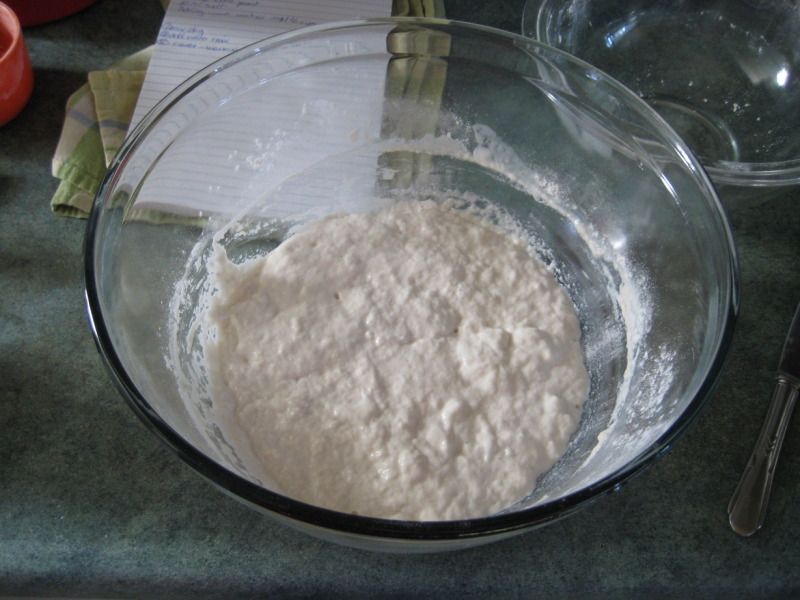
Like Christmas morning I popped out of bed to eagerly check on the bread.  Now to be fair, I grew up watching my mom make bread.  I watched bread rise, get pounded down, only to rise again.  Sounds like an inspirational poster doesn't it? So as I looked down excitedly expecting to see a puffed up bowl of dough I was sorely disappointed.  It had barely moved.  It was spewing out tiny bubbles though so I figured life did exist in there, but it seemed to be struggling.

I whinged to my husband. I abandoned it for another couple hours.  No change.  I figured, why stop now.  Maybe I am expecting too much? I read the directions faithfully.

"Scrape edges of bowl, dump out onto floured surface,  take edges and pull around then flip so you have a nice round doughball."

I poke my batter. It grasps my finger and just will not let go. Huh.  I flour said finger and have another go.  Same result.  "Uh oh." I think.  I swirl the dough around a little more and it has the consistency of thick paper mache. "And I am going to eat this?" I wonder.

Finally with much courage I flour my counter and pour this sucker onto the counter. Yes I mean pour.  It begins to spread across my counter slowly reminding me of some strange suffocating creature. Frantically I powder the top with flour and valiantly attempt to fold and edge over.  Creature says "NO!" and commences smothering my hands. My hands did not stand a chance.  Thank goodness I had had the forethought to move my wedding rings to higher ground, like the top of the fridge!

Okay enough of this, I think and I fight back with my only weapon.  Lots of flour.  I threw handfuls of flour at this thing attempting to appease it insatiable hunger for hands with flour.  Finally after much feeding and gentle kneading it was coaxed into something vaguely resembling a sloppy ball and thrown back into a bowl for a second go at rising.

Meanwhile I contacted me friend and cried for help on her blog. Being in England, I think she was sleeping at the time. Bad timezones!

According to the recipe this should take about 1.25 hours.  I eyeball it at the appointed time.  No a bit of movement.  2.5 hours, still nothing.  At this point I got bored and went and watched a movie and gave up on the whole sodding mess.

As they say a watched kettle doesn't boil, a watched fax machine will not fax, and apparently a watched batch of bread dough will not rise.

Dinner time rolls around and hubby heads into the kitchen to cook.  Next thing I hear is, "You had better come in here."

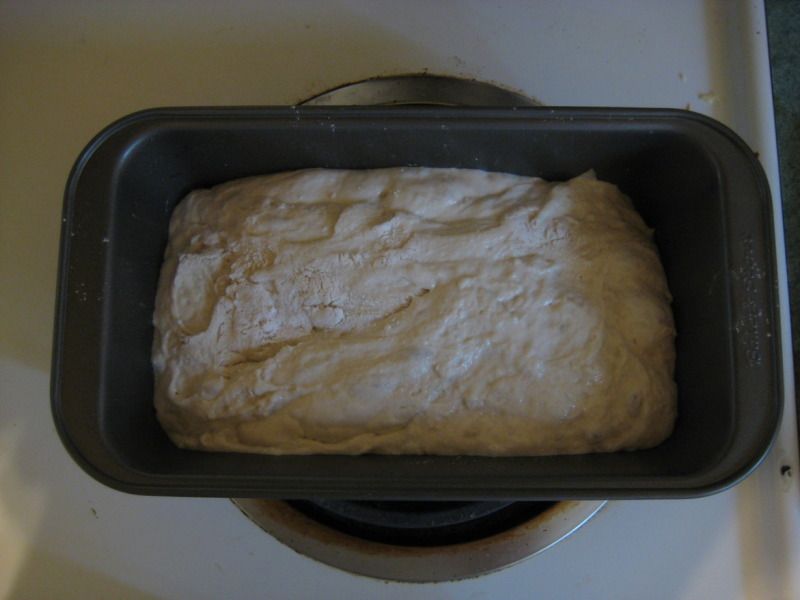
Bread dough is now twice its original size. Well, yippy!


Next I realize that the recipe actually asks for some fancy cooking set up involving more than the one rack we have for our oven.  Who would think you would essentially need to set up a humidifier in your oven to cook bread??  I decide to cook to at traditional bread temperature and then drop the heat like it is suggested in the original recipe.
 
35 minutes later my bread...looks like bread.  Holy holy.  Look at that!  And it actually tastes okay too.  A bit heavy (kind of sourdough texture), but still not bad.


  1. So what have I learned.  Even when things are not working out, throw more flour at it and keep going.
  2. Trust in my instincts 
If I am going to start cooking with recipes involving weight I had better get myself a scale

I wonder if I could get a cute once second hand...hmmm
Saturday, 9 June 2012

1946 Cooking

I have been lucky enough to get my hands on some neat old cook books.  Unfortunately I could not bring most of them home with me on the plane because of weight restrictions, but I did bring a couple with me.

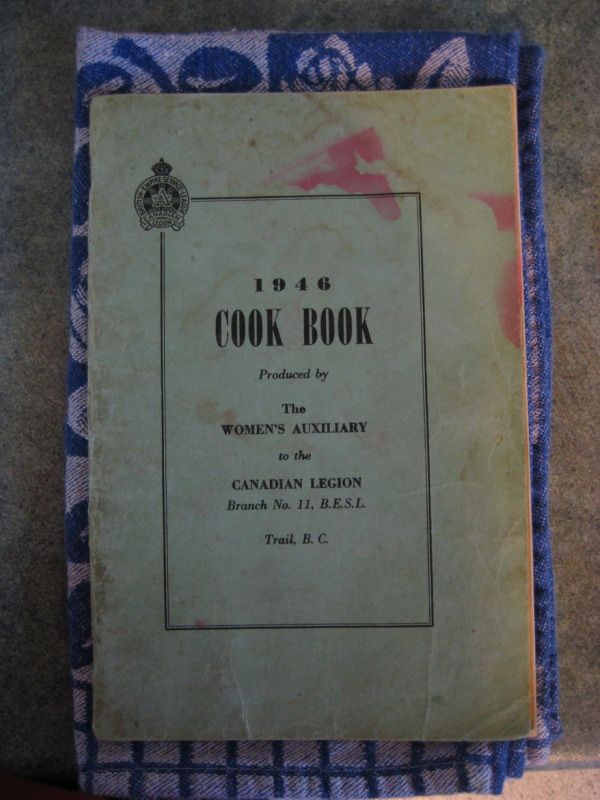
One is the 1946 Cook Book by the Women's Auxiliary to the Canadian Legion of Trail, BC.


 I took this one home as I think it is the oldest of the Auxiliary cook books. I like to imagine my Grandma pouring over these cook books trying to decide what to feed her family.  So I thought I would try out the recipes in this book. (And I bet they are yummy.  Those ladies could cook back then.)

I chose the Lemon Cake recipe as both my husband and I are total lemon fans so I thought it would be a good start.  Warning,  this along with most of the recipes in this book are not for the health conscious.  They are full of "terrible" stuff like butter and sugar and eggs.  Mmmmm...  Here is the recipe:
Lemon Cake

First Part
1 cup flour
1/2 cup butter (melted)
1/2 cup brown sugar
1 tablespoon water
1/8 teaspoon baking powder
1/4 teaspoon cream of tartar

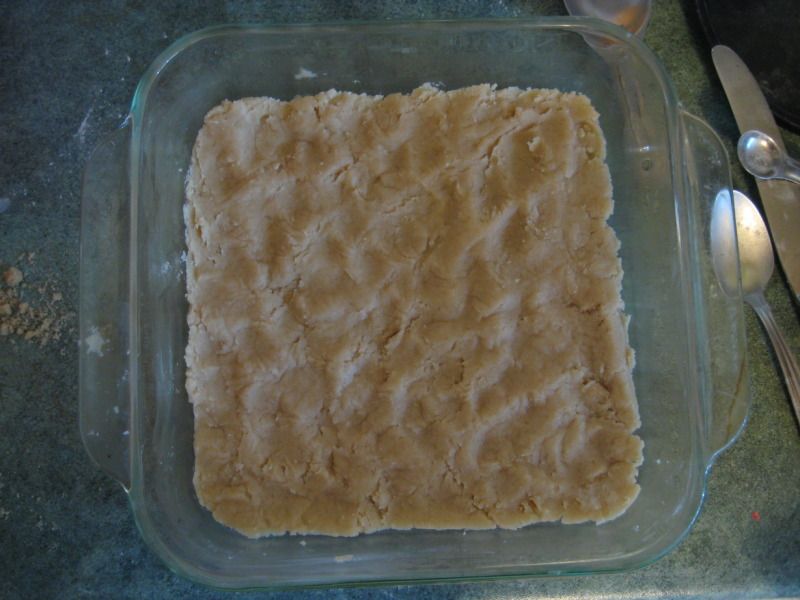
Sift flour, baking powder and cream of tartar, add sugar, butter and water.  Mix well together.  Press in greased pan.

Second Part
1 large lemon (juice and rind)
1 cup white sugar
3 eggs
1 teaspoon melted butter
Pinch of salt

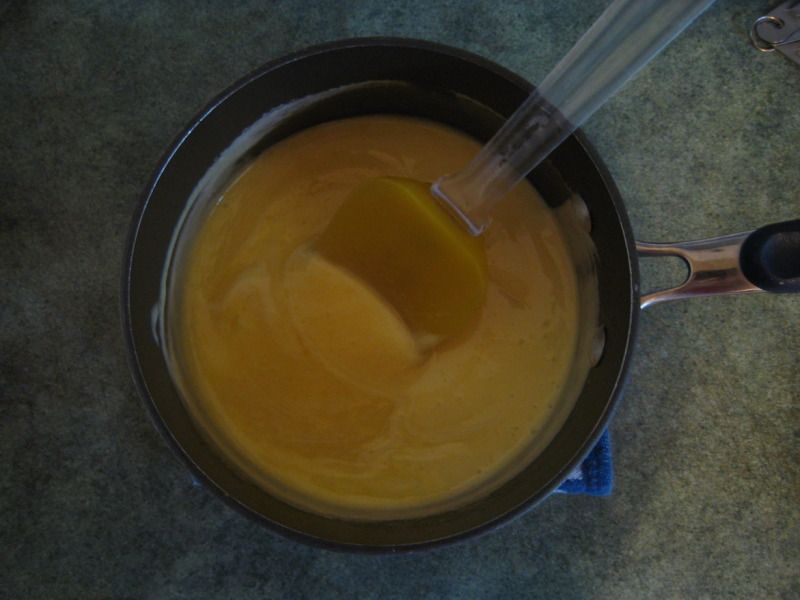
Beat eggs and sugar together, add butter, salt, rind and juice of lemon.  Cook in saucepan until thick, set to cool.  Then spread over first part.

Third Part
2 cups cocoanut
1 tablespoon butter
1 egg

Mix together, spread over lemon filling. Bake in moderate oven 30 minutes.

---Mrs. A. D. Fletcher

This is what it looked like after the first part is complete. I made no changes.


The second part looked like this when it was done.


I did make a bit of a change. I used two largish lemons so there was more rind.  I would say I used between about 1/8-1/4 of a cup.  I also used the juice of 1 1/2  lemons (1/3 cup if your using juice from a bottle).  I really like lemons. :)

The third part had no changes although the egg should be beaten before adding the coconut and the butter should be melted.


I baked it at 350degrees for only about 20 minutes although my oven tends to run a bit hot.

It turned out like this:


They will get a taste test tomorrow!  Stay tuned.

I also did some gardening today. 


I have been growing flowers from seed this year and I felt they were now old enough to be planted outside.  I have been digging out these abandoned tires which were once used as planters so I can use them again.  They were absolutely over run with grass and weeds when I started.

Marigold (bought) surrounded by Pansies (grown from seed)
To be planted with poppies
Zinna (from seed) in yellow Poppies and Pansies in green pots

Random Rupert!

Today was Seafest and for the first time in the 2 1/2 years we have been here it was finally sunny for the festival!  Usually we watch the poor families out with their umbrellas in the cold and rain watching the parade and playing street hockey etc.  Rupert decided to surprise us this year.

We went down and watched the parade and plowed through the crowds (crowds are very abnormal in Prince Rupert.  It was a strange feeling.)

Unfortunately I left my camera at home.  Rats!

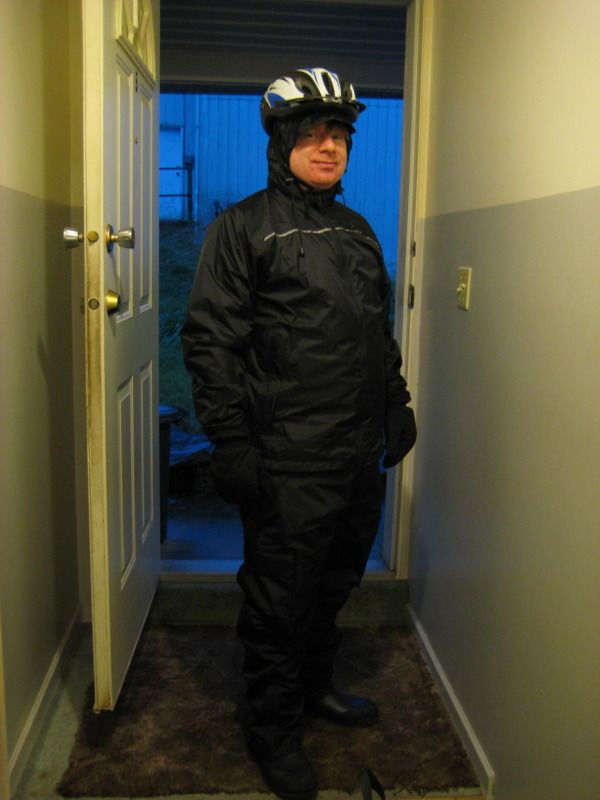
Just in case you wonder why I make such a big deal about the sun, here is a picture of my husband heading off for work in the morning.  Hard core rain gear!  Only in Prince Rupert can a store survive that completely caters to rain gear.  It is called "Slickers".


Yes, we do get the most rain in Canada per year.  What a claim to fame. :)

Crafting in Progress!
Gray Cardigan
20% done!
Bubblegum Blouse
100% done!
Cranberry Skirt
70% done!